This natural wellness elixir combines the anti-inflammatory power of turmeric and ginger with the soothing sweetness of honey. Perfect for boosting immunity, easing sore throats, and promoting overall wellness, it is easy to make and store. This simple yet powerful mixture has been used in traditional medicine for centuries and is now a staple in many health-conscious households.
The turmeric ginger honey bomb is more than just a remedy—it’s a daily ritual that supports your body’s natural defenses. Whether you’re fighting off a cold, soothing a sore throat, or simply looking to add a wellness boost to your morning routine, this golden mixture delivers.
Why This Wellness Bomb Works
This recipe succeeds because each ingredient brings its own powerful health benefits, and together they create a synergistic effect:
Turmeric contains curcumin, a compound with powerful anti-inflammatory and antioxidant properties. It supports joint health, reduces inflammation, and has been studied for its potential to support overall wellness.
Ginger is renowned for its ability to soothe digestion, relieve nausea, and boost immunity. Its warming properties make it especially comforting during cold season.
Honey is a natural antimicrobial and antibacterial agent. It soothes sore throats, suppresses coughs, and adds natural sweetness while providing its own health benefits.
Black pepper is the crucial secret ingredient. It contains piperine, which dramatically increases the absorption of turmeric’s curcumin—up to 2,000%! Without black pepper, much of turmeric’s benefits would pass through your system unabsorbed.
Optional cayenne and lemon add circulation-boosting capsaicin and immune-supporting vitamin C for an extra wellness kick.
The Complete Recipe: Turmeric Ginger Honey Bomb
Prep Time: 10 minutes | Total Time: 10 minutes | Yield: Approximately ¾ cup
Ingredients
½ cup raw honey (preferably local, raw, and unfiltered)
1 tablespoon turmeric powder or 1-inch fresh turmeric root, grated
1-inch fresh ginger root, grated
¼ teaspoon black pepper (freshly ground is best)
Optional: a pinch of cayenne pepper
Optional: juice of ½ lemon
Step-by-Step Instructions
1. Prep the Roots
If using fresh turmeric and ginger, peel them first (a spoon works well for scraping off the skin). Finely grate both roots using a microplane or the fine side of a box grater. Fresh roots provide more active enzymes and a brighter flavor than dried powders.
2. Mix Ingredients
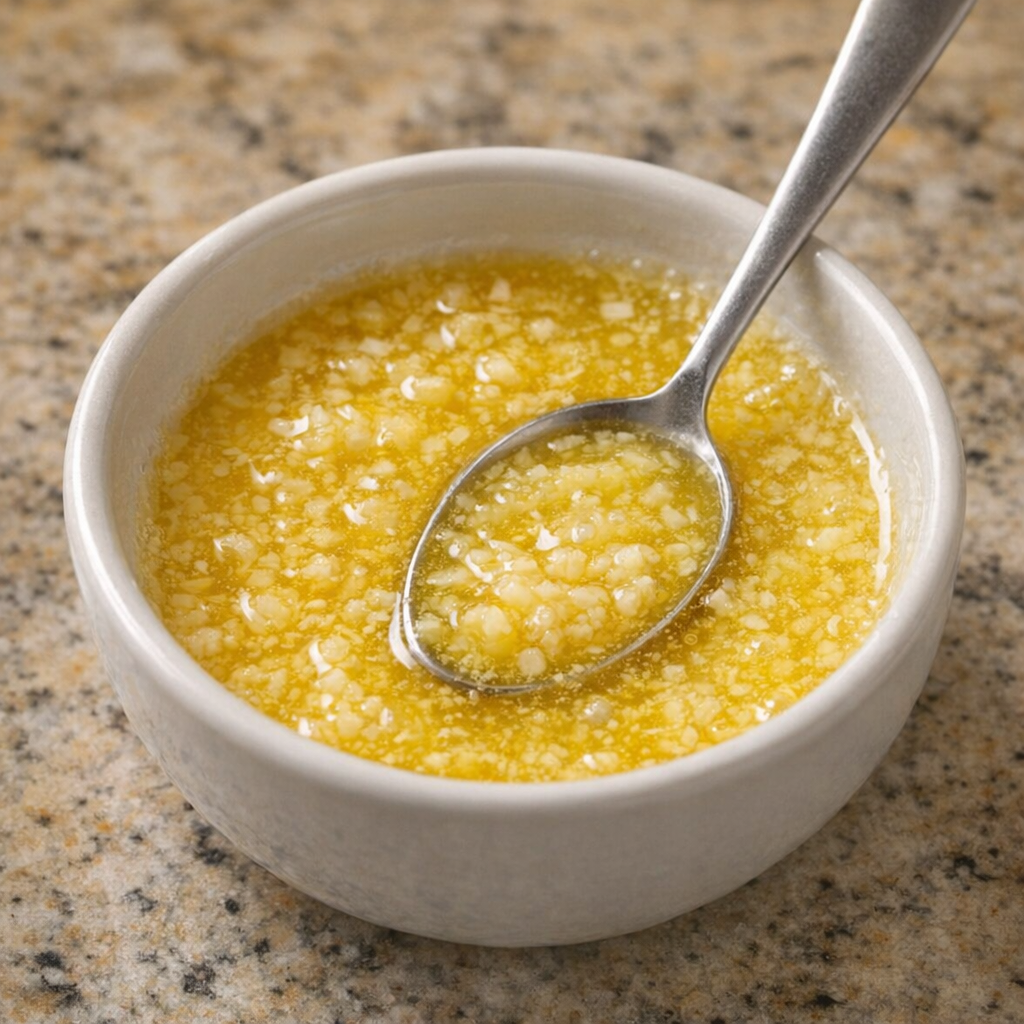
In a small bowl, combine the honey, turmeric (powder or fresh grated), grated ginger, and black pepper. If using, add the cayenne pepper and fresh lemon juice.
3. Combine Well
Stir vigorously until the mixture is uniform and well combined. If using fresh turmeric or ginger, let the mixture sit for a few minutes after stirring—the honey will naturally draw out their juices, creating an even more potent elixir.
4. Storage
Transfer the mixture into a clean glass jar with a tight-fitting lid. A 4-ounce or 8-ounce mason jar works perfectly. Store in a cool, dark place away from direct sunlight. The mixture can last up to 1 month when properly stored.
5. Usage
Take 1 teaspoon daily for general wellness. You can:
Eat it directly off the spoon
Stir it into warm (not boiling) water for a soothing tea
Add to your morning tea or coffee
Mix into warm milk for a golden milk latte
Use as a natural sweetener with an immune boost
Benefits
Turmeric is anti-inflammatory, antioxidant, and supports joint health
Ginger soothes digestion, relieves nausea, and boosts immunity
Honey is a natural antimicrobial, soothes sore throats, and adds sweetness
Black pepper increases absorption of turmeric’s curcumin by up to 2,000%
Cayenne and lemon boost circulation and vitamin C intake
Pro Tips for the Best Honey Bomb
Use Raw Honey: Raw, unfiltered honey retains more of its natural enzymes and beneficial properties than processed honey.
Fresh vs. Powdered: Fresh turmeric and ginger root provide a brighter, more potent flavor, but high-quality dried powders work well too. If using powders, ensure they’re fresh—spices lose potency over time.
Don’t Use Boiling Water: Adding the honey bomb to boiling water can destroy some of honey’s beneficial enzymes. Use warm water (below 140°F / 60°C) instead.
Start Slowly: If you’re new to turmeric and ginger, start with a smaller dose (½ teaspoon) to see how your body responds.
Stain Warning: Turmeric can stain counters, clothing, and utensils. Be careful when preparing and cleaning up.
Usage Ideas
Morning Wellness Shot: Take a teaspoon first thing in the morning, followed by warm lemon water.
Golden Milk: Stir a teaspoon into warm milk (dairy or plant-based) with a pinch of cinnamon.
Cold Soother: Add to warm tea with extra lemon when you feel a cold coming on.
Sore Throat Remedy: Take a teaspoon slowly, letting it coat your throat.
Smoothie Booster: Add to your morning smoothie for an anti-inflammatory boost.
Storage
Room Temperature: Store in a cool, dark place for up to 1 month. The honey acts as a natural preservative.
Refrigerator: You can refrigerate for longer storage, though the mixture may thicken. Let it sit at room temperature for a few minutes before using.
Conclusion: Nature’s Medicine in a Jar
The Turmeric Ginger Honey Bomb is proof that the most powerful medicine is often the simplest. With just a handful of natural ingredients, you can create a wellness elixir that supports your body’s health and immunity in multiple ways.
Easy to make, easy to store, and easy to incorporate into your daily routine, this golden mixture deserves a place in every kitchen. Whether you’re fighting off seasonal bugs or simply supporting your overall wellness, this honey bomb delivers nature’s healing power in every spoonful.